I've always considered myself a 'one kit at a time' sort of modeller, but in the last few years I've strayed a bit and have ended up with several builds on the go at once.
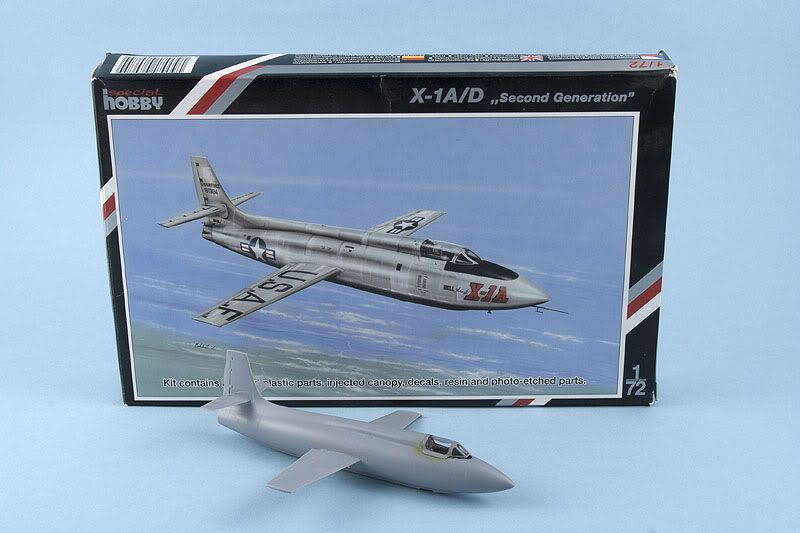
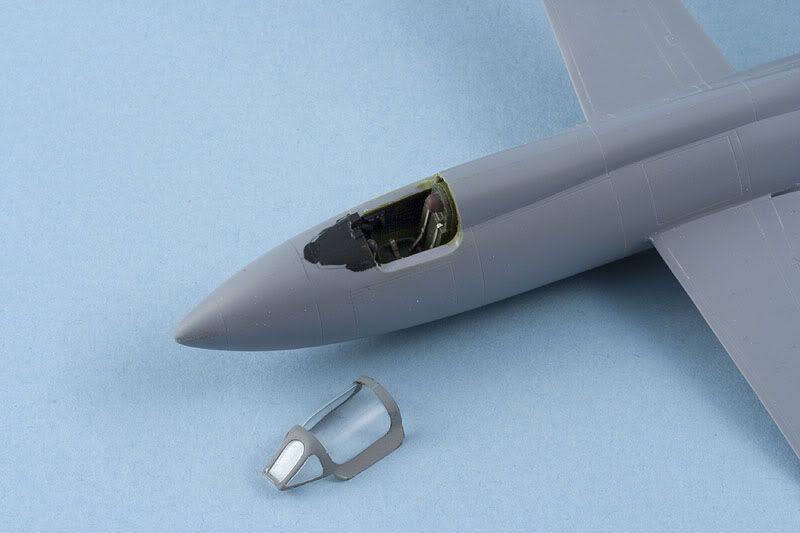
Special Hobby 1/72 Bell X-1
Last worked on: December 2010
Status: Stalled due to canopy fit issues. I'd masked and painted the canopy once but scuffed the masking so many times trying to attach it to the model that I pulled all the masking off, meaning I'll have to do it all over again. To make matters worse I'd tried clamping the canopy in place last time which caused stress marks on the clear part; I'm hoping they won't show up too much when it's done. I've been unable to find pictures of the real X-1's canopy open – it's either closed or removed completely.
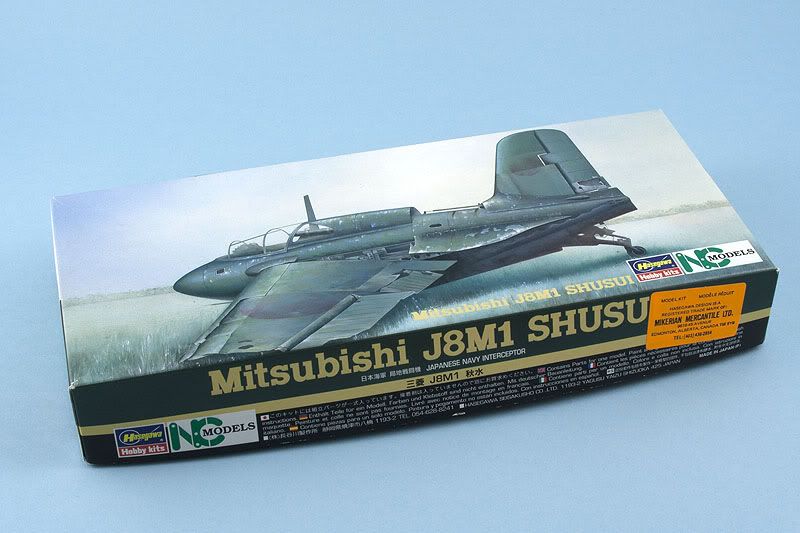
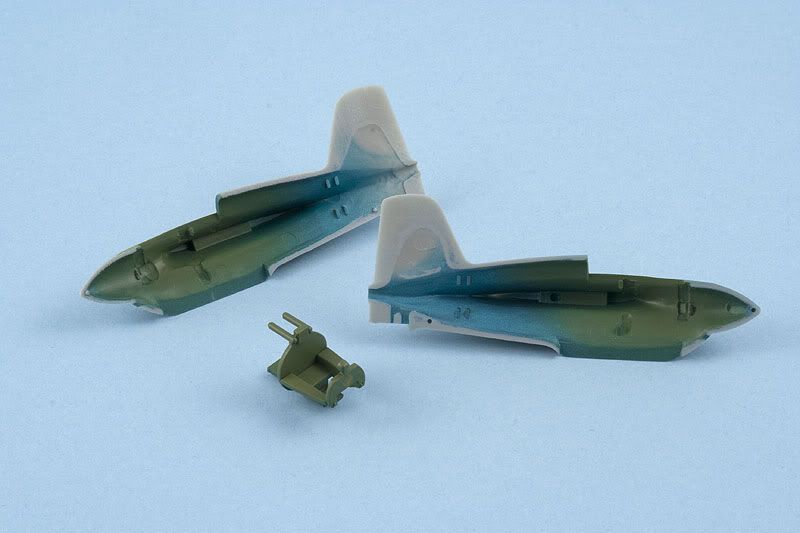
Hasegawa 1/72 Mitsubishi J8M1 Shusui
Last worked on: October 2011
Status: Stalled due to laziness in adding cockpit detail. The kit was given to me already started; someone had nicely airbrushed the interior with Aotake, that metallic blue-green colour. However from what I can gather the Shusui, Japan's version of the Me163, had its cockpit painted in Mitsubishi green so I re-sprayed the interior. The original intention had been to build the kit straight out-of-box but the clear parts are so good they show up the model's deficiencies in this area, so some detail will have to be added. Probably just a seat back, harness, instrument panel and consoles, but I hate doing that stuff...
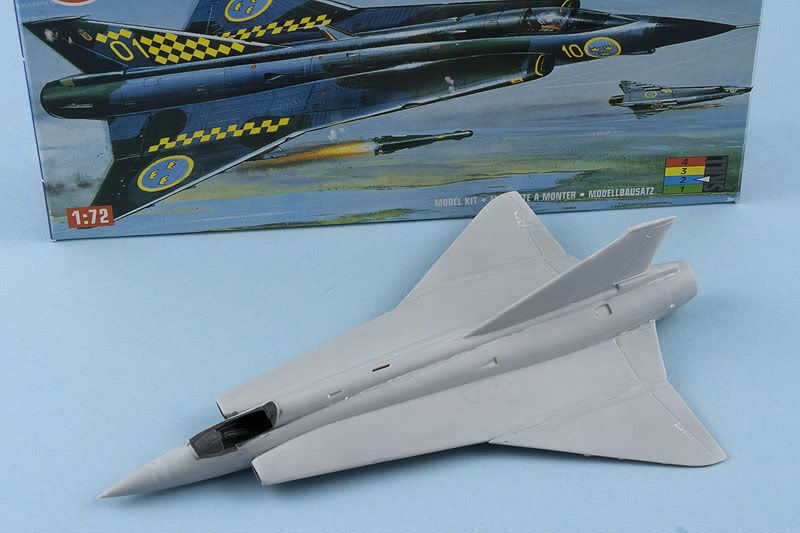
Airfix 1/72 Saab Draken
Last worked on: 30 January, 2012
Status: Current. All of the heavy raised surface detail has been sanded off and the basic airframe is together, so now it's lots of sanding and filling and preparing for paint. This one will be mounted on a base in flying mode, so all of the pesky undercarriage parts have been consigned to the spares box and – gasp – I've painted a pilot. My figure painting skills need work.
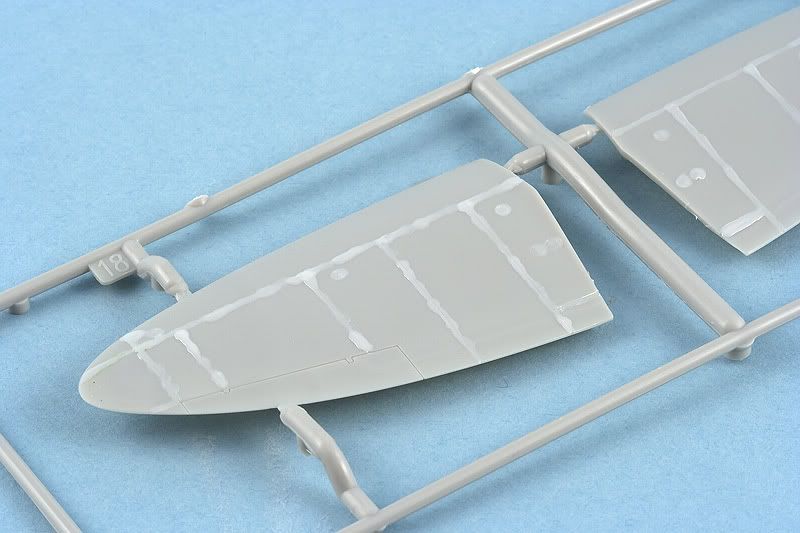
Airfix 1/72 Spitfire PR.XIX
Last worked on: September 2011
Status: Stalled due to loss of interest. I've already built one of these and have to say that it was an enjoyable project but I was never quite happy with the heaviness of the panel lines. For the second attempt I filled all of the surface detail with liquefied styrene (achieved by soaking offcuts of sprue in a jar of Tamiya liquid poly cement). After a couple of applications it seems to have worked, but maybe too well. It's a beggar to sand smooth, and having done so I just put everything back in the box until I could rekindle the interest.
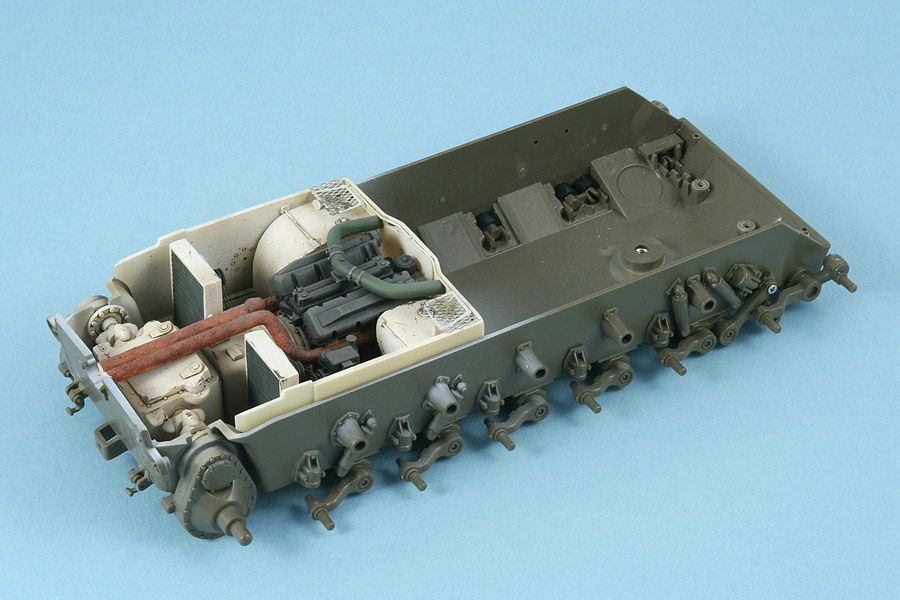
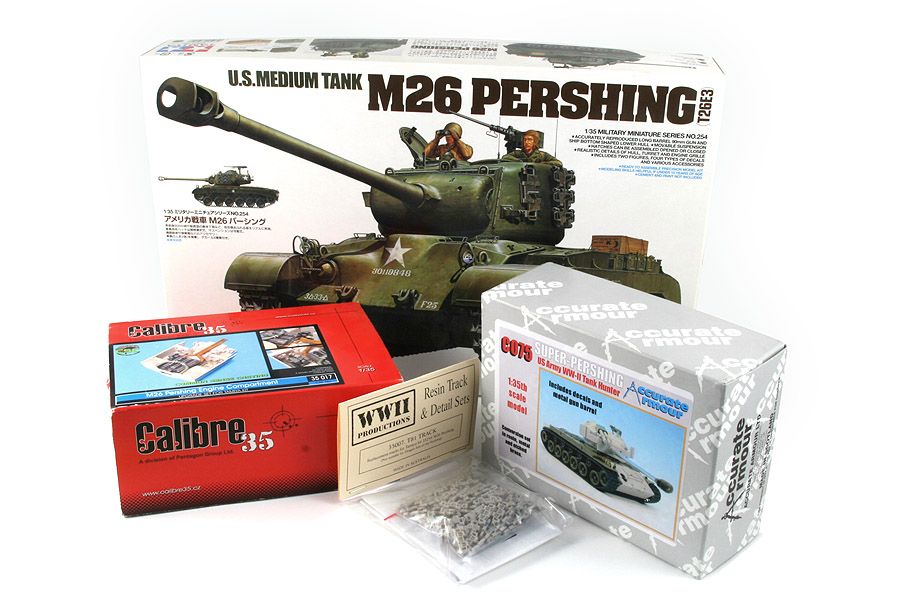
Tamiya 1/35 Super Pershing conversion
Last worked on: Oh heck. July 2009
Status: Stalled, due to individual track links. This was one of those projects, inspired by a great build in Tamiya magazine, for which I bought every after-market set going including the Accurate Armour Super Pershing resin update and an Aires engine. Everything was going (reasonably) well until it came time to do the tracks, and I chickened out. On numerous occasions I've pulled the kit out, looked at the parts, quietly put it back. However, there's hope: an armour-building mate has offered to sit down and show me how to assemble them, so this kit may re-surface some time soon.